SNMP
Description
This article describes installing, setting up and monitoring SNMP with WCC Lite.
Install
To install SNMP to the WCC Lite you need to download .ZIP archive that has all the files necessary -> SNMP_tutorial.zip
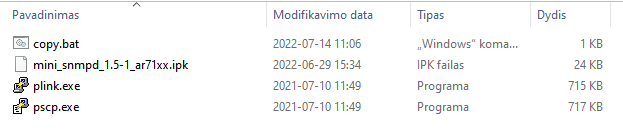
Now you need to extract the .ZIP file. You will get a folder called SNMP tutorial. Go inside it and you will find these files:
The next step is to ensure that the WCC Lite is reachable by your computer, you can do it in many ways. One of them is to connect it to your PC via ethernet cable to the WCC Lite ETH0.
After making sure there is a connection you can test it by opening your internet browser and entering the IP of the WCC Lite. If you have the default settings and WCC Lite is connected to your PC via an ethernet cable, then the IP is 192.168.1.1
Now you can open the copy.bat file. It will ask for the IP of the WCC Lite at first, enter the IP. Next is the username and password. If the defaults are left, the username will be root and password - wcclite.
Your command window should look like this:
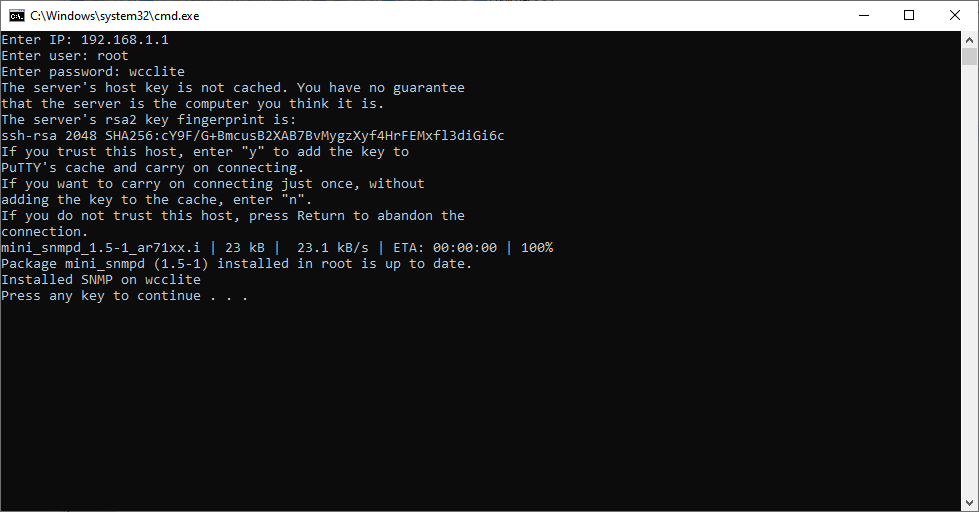
After installing you exit the command line and the SNMP is installed on your device.
The WCC Lite .MIB file can be downloaded from here -> ELSETA-WCCLITE-MIB.mib
The next step is to download a SNMP trap watcher program. For this example we are going to use MIB Browser, which can be downloaded from here -> MIB browser setup.exe
After installing the program you will need to upload the downloaded ELSETA-WCCLITE-MIB.mib file to the MIB Browser:

Setting up
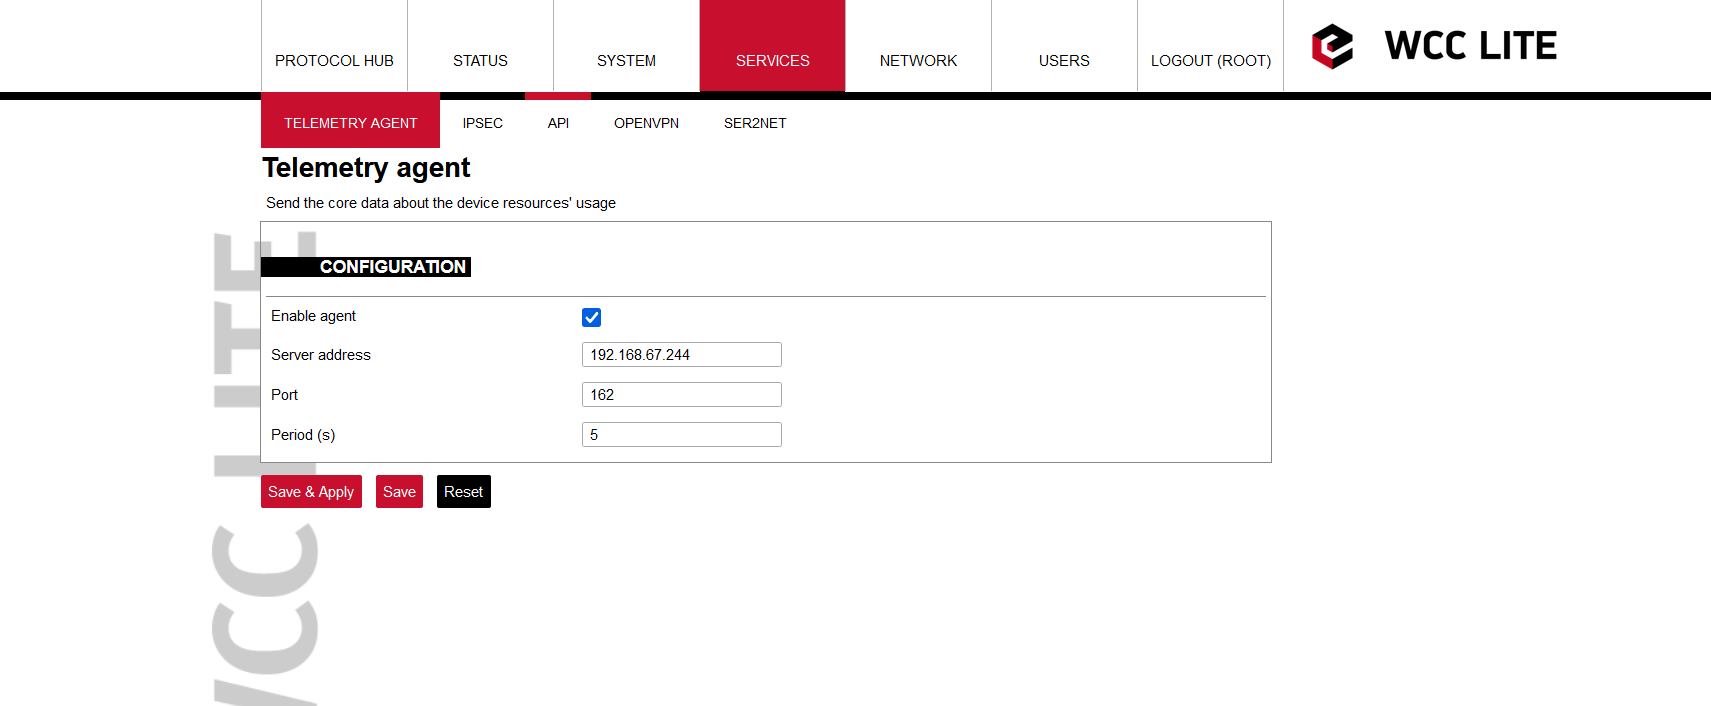
Now you will need to allow the telemetry agent service on WCC Lite to send the core data about the device resources' usage. Server address is your computer's IPv4 address. The usual port for SNMP is 162. Set the sending period as needed and press Save & Apply. The screen should look something like this:
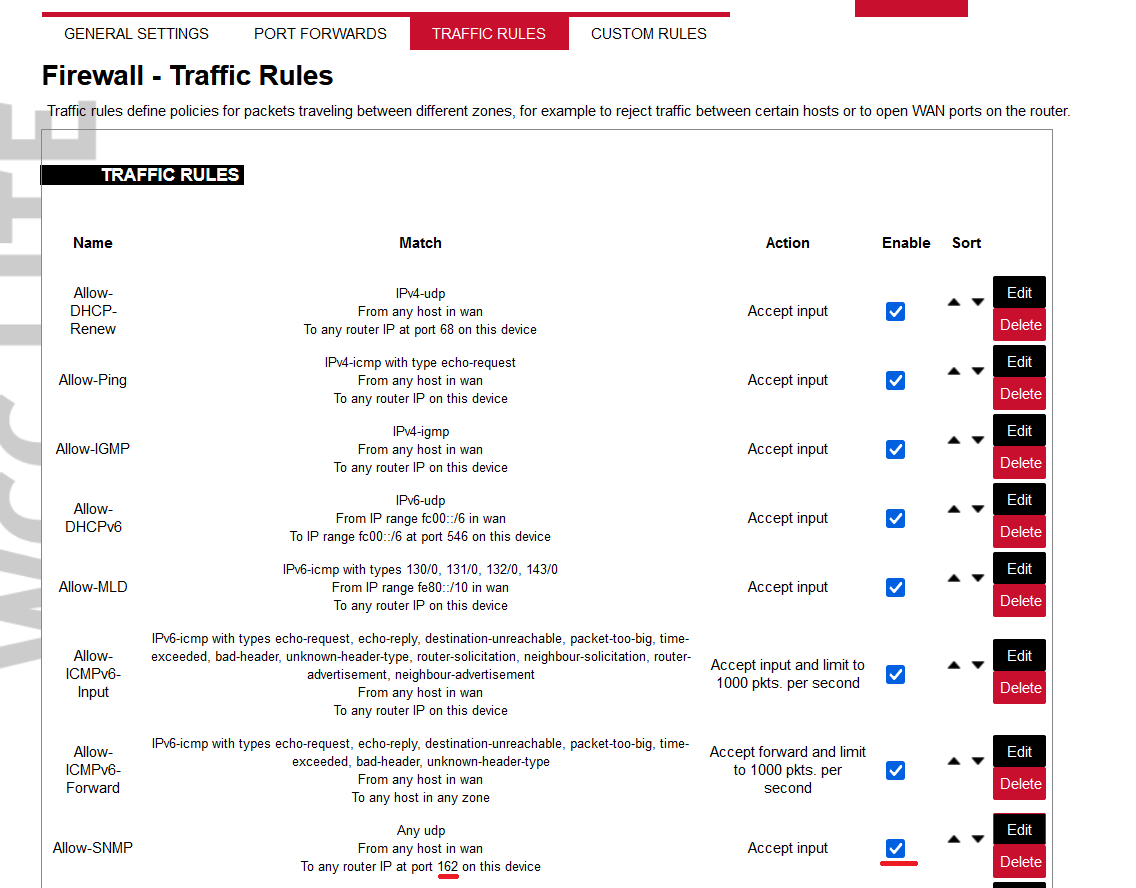
After setting up the Telemetry agent tab navigate to Network -> Firewall -> Traffic rules. Enable the Allow-SNMP packet and edit the destination port to match the one in Telemetry agent screen (for this example it is 162):
Next step is to change the port to 162 in the installed mini_snmpd on WCC Lite. You can do that via the Ubuntu terminal. Log into WCC Lite by typing in ssh root@192.168.1.1 . The password is wcclite . Now type /usr/bin/mini_snmpd -h and after pressing enter you will see this screen:
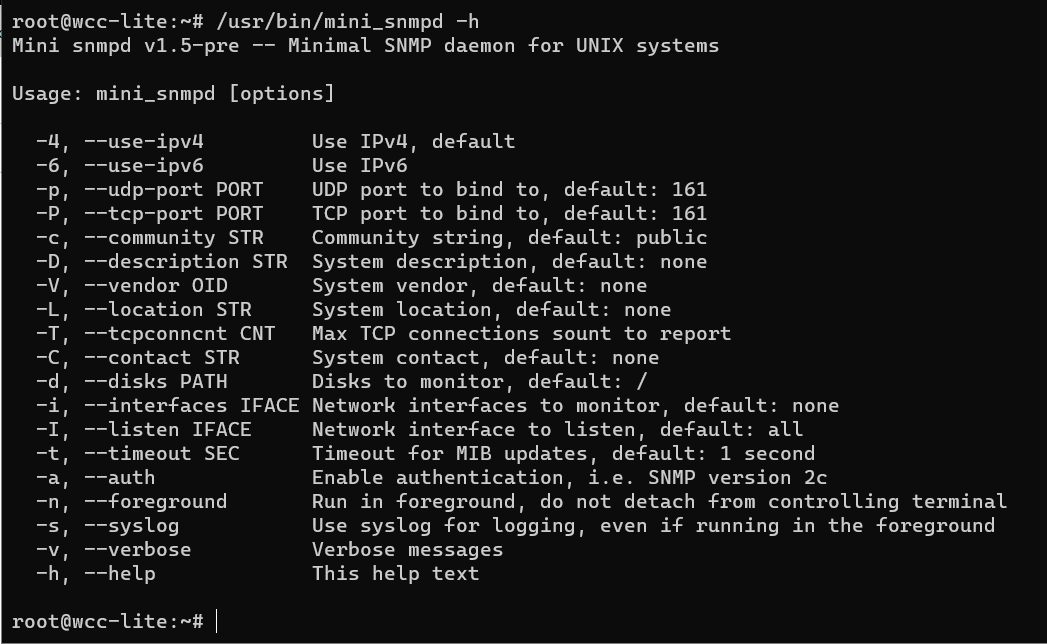
Now you will need to type in these commands: /usr/bin/mini_snmpd -p 162 and /usr/bin/mini_snmpd -P 162 to change the port to 162.

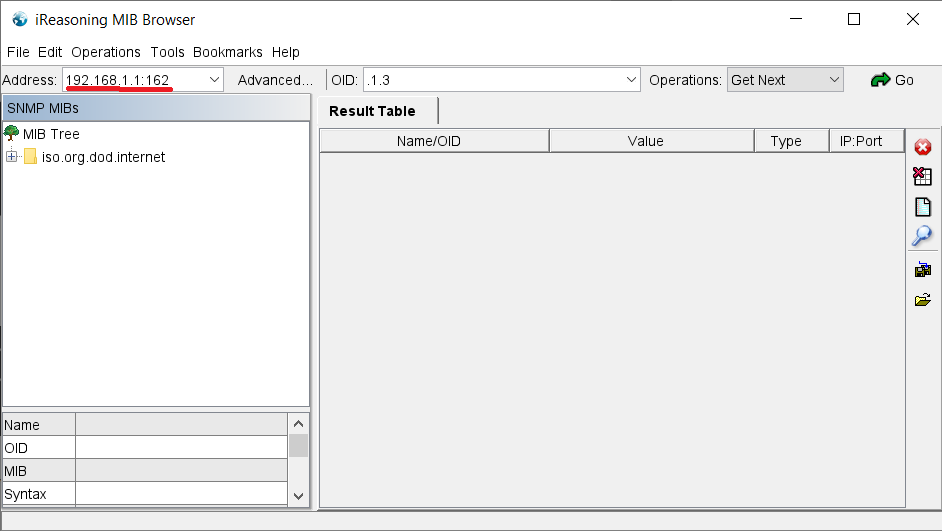
After these changes you can now go back to the MIB Browser program and change the address to the IP you used while connecting to WCC Lite web. For example:
Monitoring
If no errors occurred you should be able to monitor the data about WCC Lite resources' usage with SNMP. For example, by pressing right click on the private folder and pressing the Walk option, you will see the window bellow, which represents the result table of resource usage.

The given ELSETA-WCCLITE-MIB.mib contains an old version, so as of now, the results might not be accurate or they may not show at all. Update of the MIB file is needed.