IEC-104 Master SCADA Setup
Initial Setup.
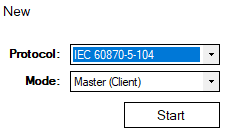
First connect to a network from which the IEC104 Slave device is reachable. When you're connected to the network it's time to open The Vinci Software and start configuring the SCADA parameters. The Vinci Expert will simulate the Master (Client) when the software is started select the IEC 60870-5-104 protocol and select Master mode, after making these selections press the start button.
Fig. 1. Selecting Protocol and Mode.
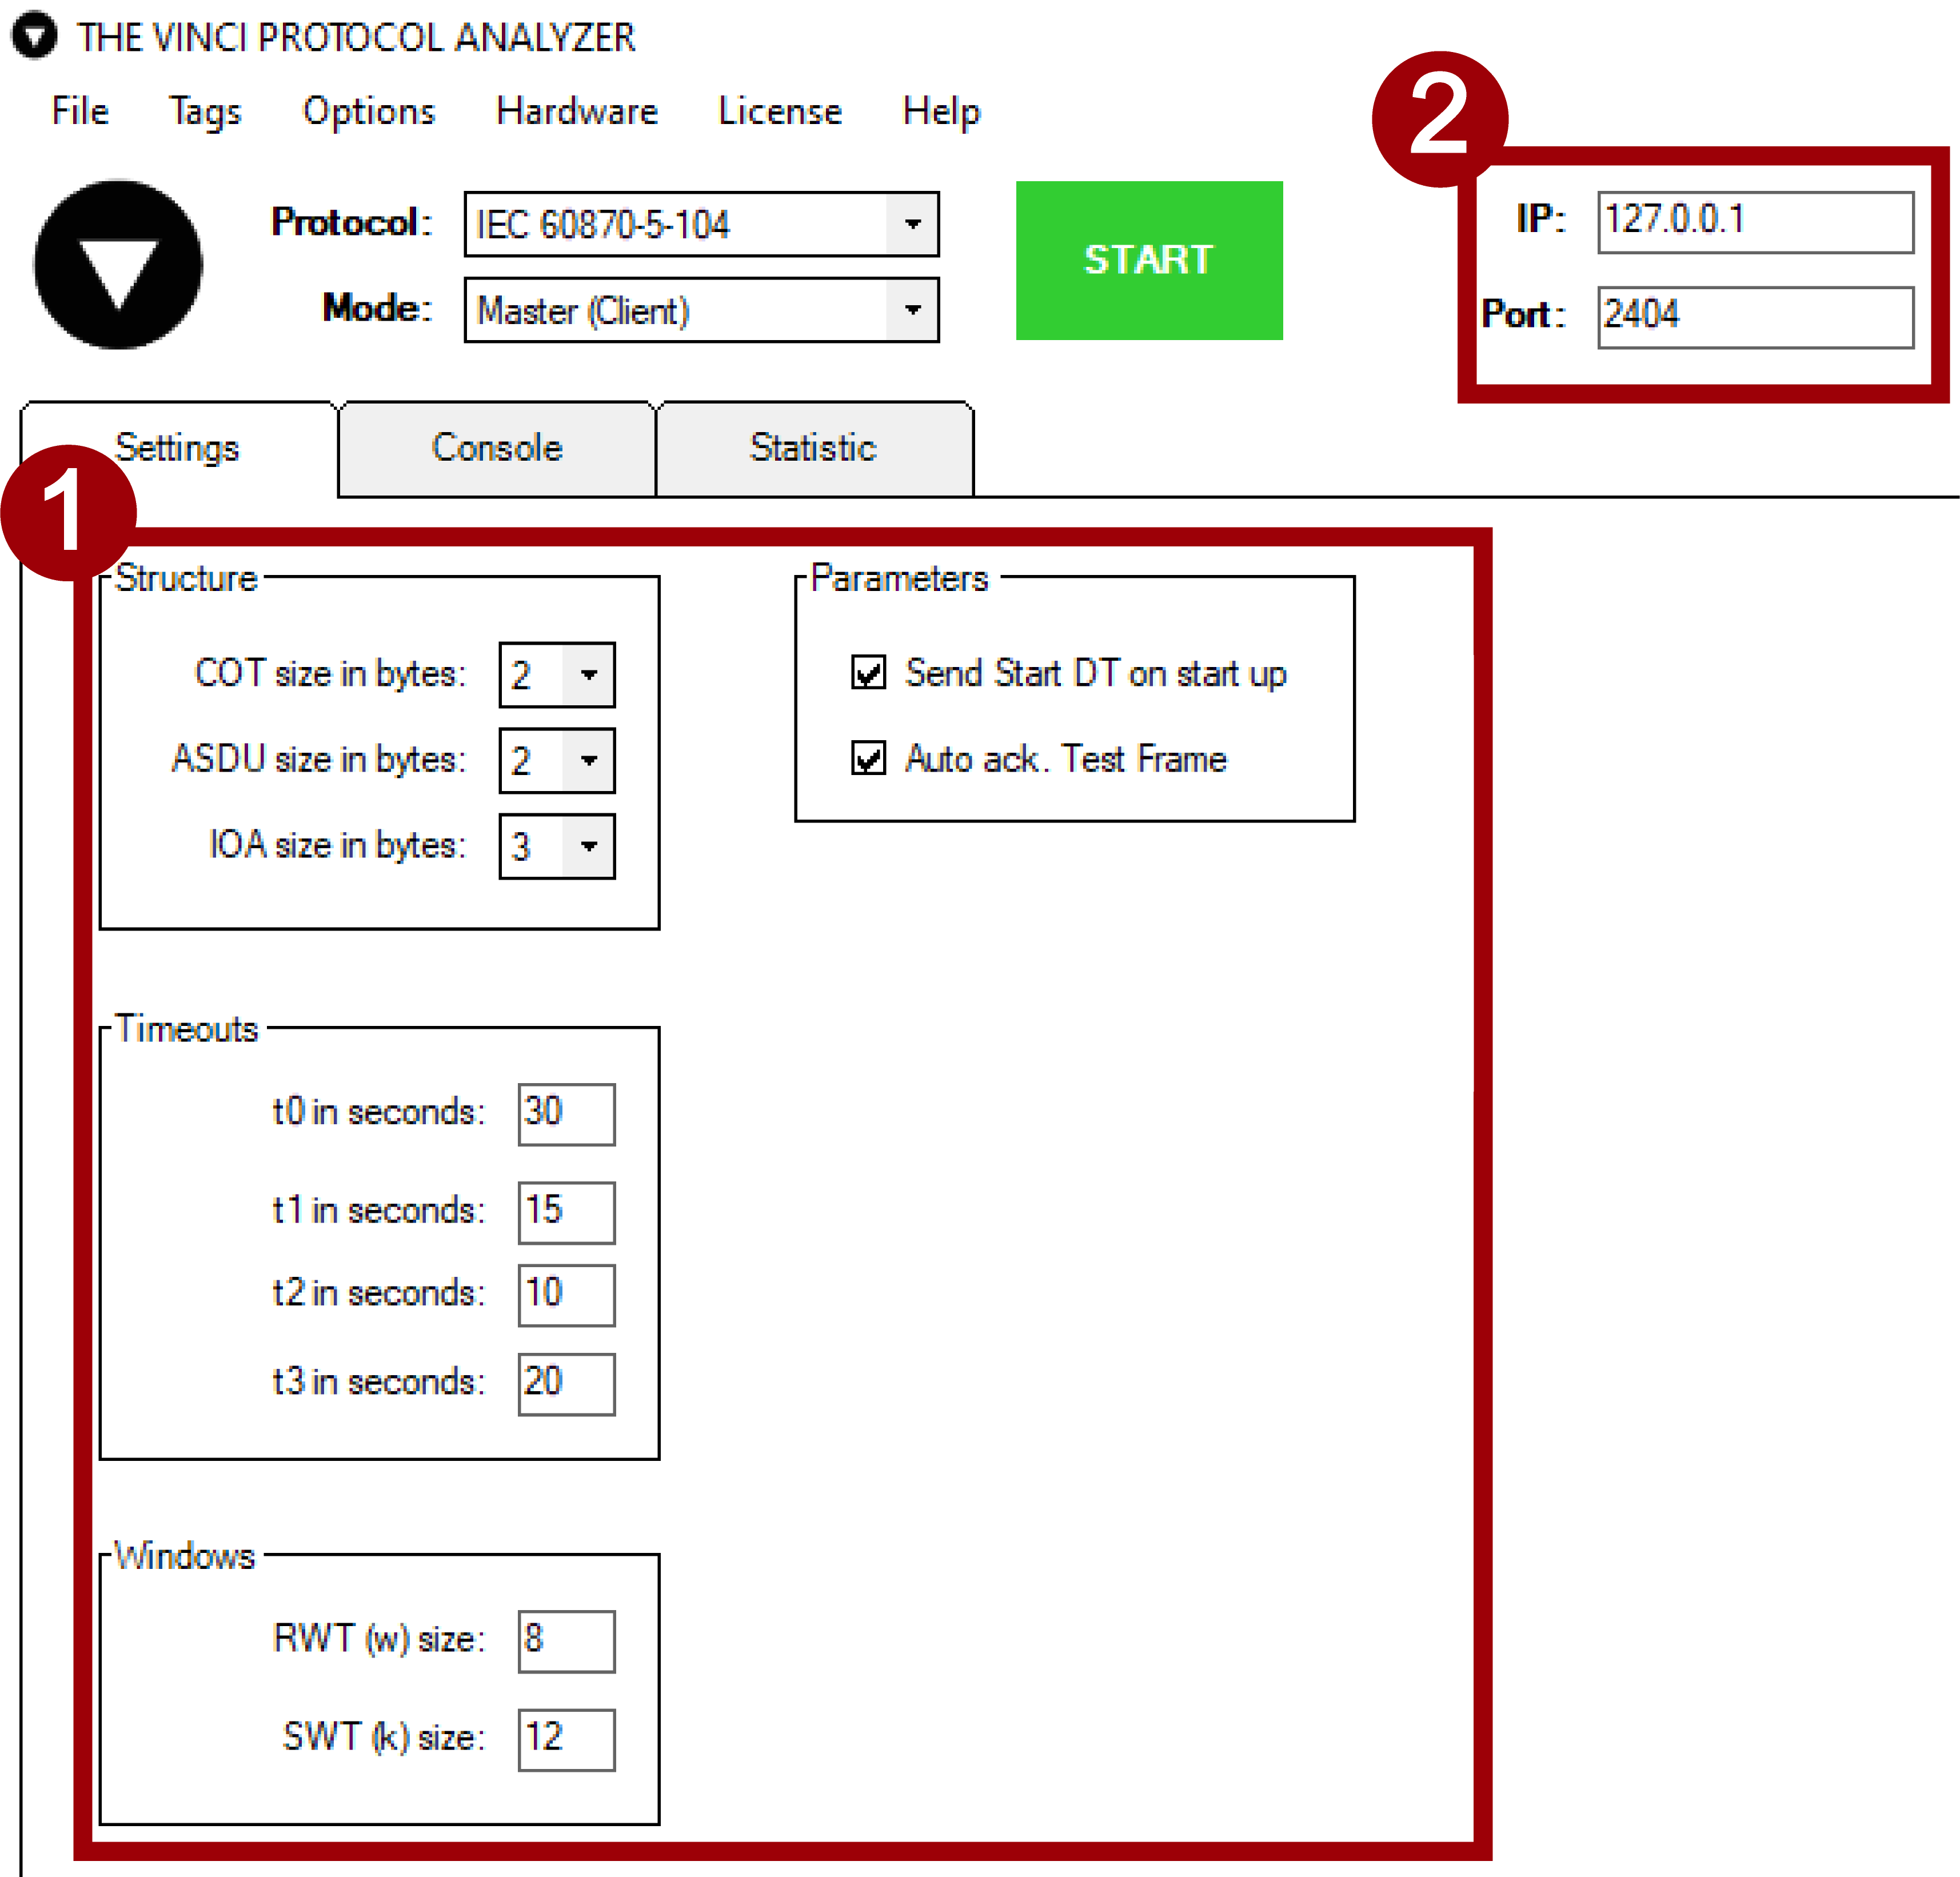
Once the software opens go to the settings tab as depicted in the figure below. Then configure settings in accordance with the Slave device. The defaults that are here are usually good in most cases, but make sure to double-check. After configuring the parameters enter the IP and port of the SCADA system they are located at the top of the window to the right of the green start button.
Fig. 2. Configuring settings according to SCADA
Establishing a connection.
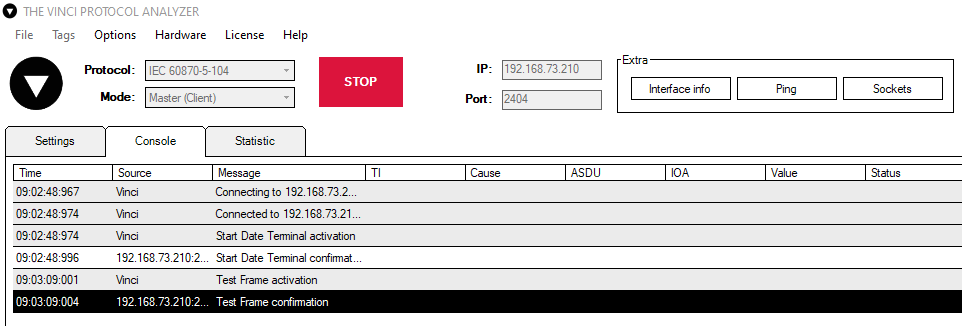
To begin communication with IEC 104 Slave once everything is configured press the green Start button and communication should begin. If it doesn't check if you have entered the correct IP and the Slave is reachable by pinging.
Fig. 3. Connection Established
Command overview.
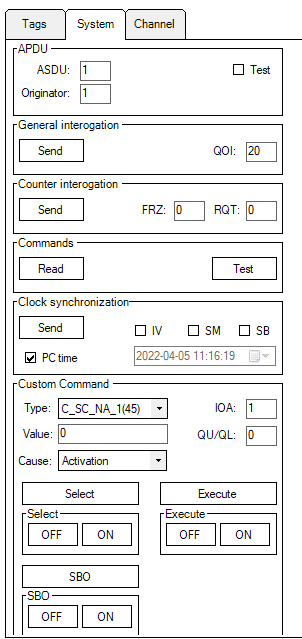
In the system tab, you can see all the IEC 104 commands that Vinci Software supports. A more detailed command description can be found here. To begin to send commands, first you need to configure your ASDU (CASDU) and Originator at the top of the System tab. (ASDU referred to here is the Common Adress or better known as CASDU). After entering the correct ASDU (CASDU) commands can now be sent. To check if the device is responding with the correct data, a good command to test is General interrogation.
Slave response.
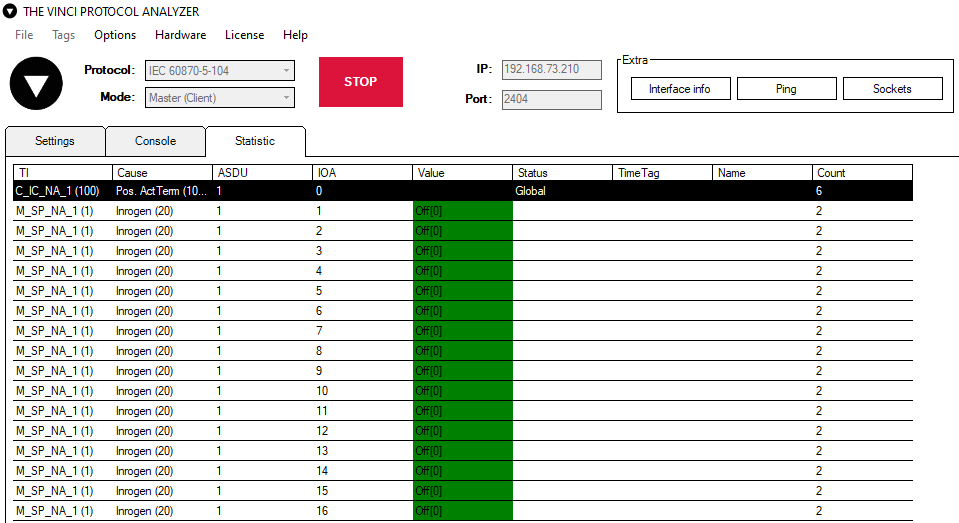
After sending the general interrogation command, the Slave device should respond with all the values that it is currently measuring. The Statistic tab will display all the gotten values in an orderly fashion, as depicted in the figure below. In this case, the data is gotten from a 16DI IOMod. As we can see, all the inputs are off.
Sending custom commands.
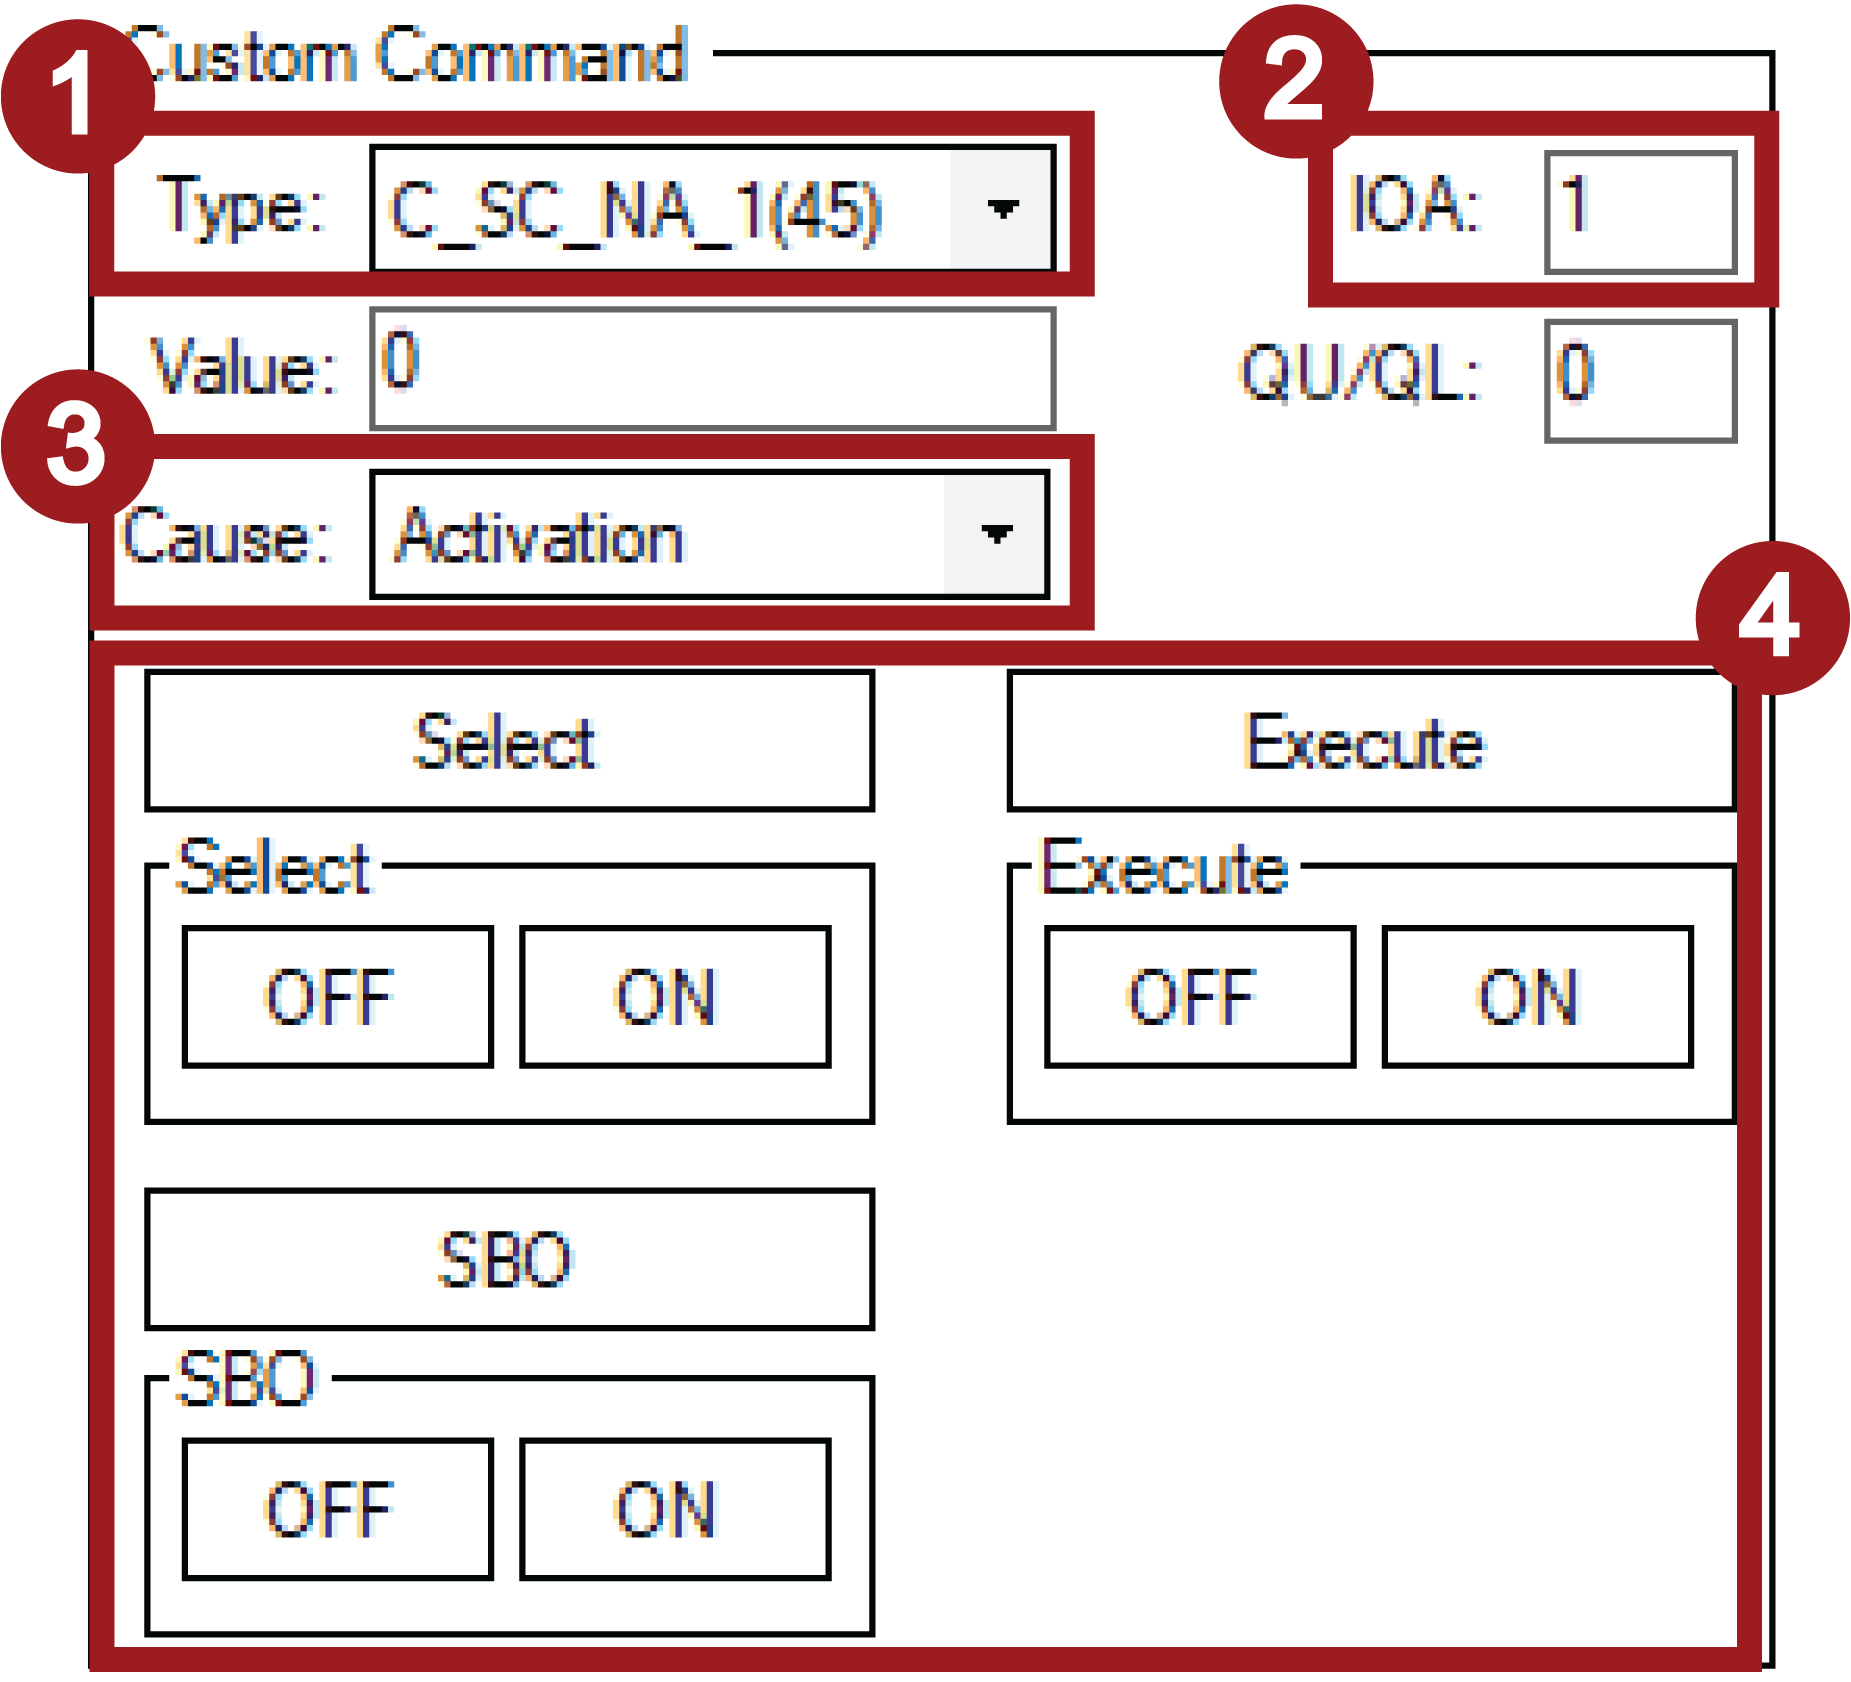
At the bottom of the system tab, you can configure it to send custom commands. To configure a custom command, follow these steps
- Select the type of the command.
- Enter the IOA (Information Object Address).
- Choose the command cause.
- Choose what type of command you want to send.
- If Select, Execute, or SBO (Select Before Operate) buttons are pressed, a command will be sent with the value entered in the value field.
- If ON or OFF buttons are pressed, values will automatically be filled. 0 meaning OFF and 1 meaning ON
w
Considering often used functionalities for SCADA, that is about it. Of course, all values in the statistics window can be formatted using tags, although it doesn't make much sense since all data from IEC104 Slave has a type defined in the packet, so Vinci Software automatically formats it for that type. And the channel tab is mainly for testing, because the Vinci software also automatically sends S-Frames and Start DT, Stop DT, and Test frame commands.

