8.1 Initial Setup
WCC Lite comes with a static network configuration with its IP set to 192.168.1.1. For initial setup set a static IP address on your computer and connect your network card to the WCC Lite with an ethernet cable.
8.1.1 Static IP Address Setup on Windows
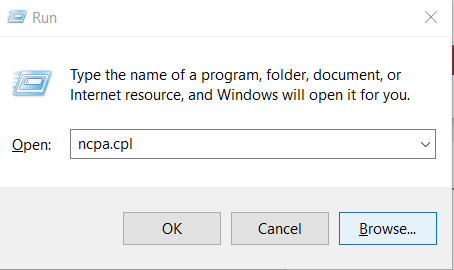
1. Press Win+R on your keyboard. This will open the run window. Enter ncpa.cpl and press OK. This will open the Network Connections window.
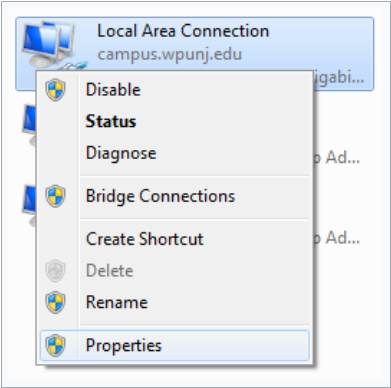
2. Right-click on the Local Area Connection icon, then select Properties
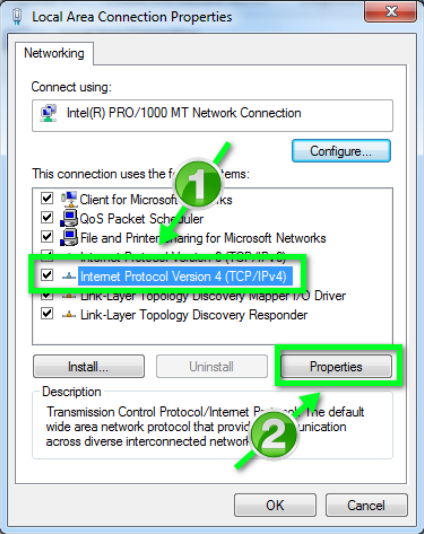
3. In the window that opens, click on Internet Protocol Version 4 (TCP/IPv4) (you may need to
scroll down to find it). Next, click on the Properties button.
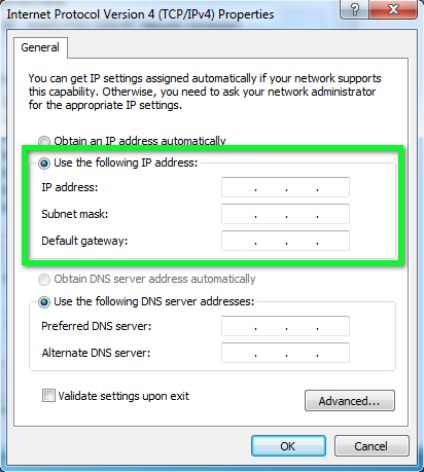
4. In the window that opens, click the Use the following IP address radio button. Fill in the following fields and click OK:
- IP address: 192.168.1.2
- Subnet mask: 255.255.255.0
- Default gateway: (leave empty)
8.1.2 Connecting to an internal web page
If your computer IP address is set up and an ethernet cable is connected, power up the device. Wait a few minutes until the device boots. Then open your web browser and enter the following URL: http://192.168.1.1/
Supported web browsers:
- Google Chrome (recommended)
- Mozilla Firefox
- Internet Explorer 8 or later

Login with the root user:
- Username: root
- Password: wcclite
It is recommended to change the password immediately to avoid any unauthorized access.
Before plugging WCC Lite with a static IP address into the local computer network, make sure to check if such an address is not already reserved by other devices.